Would you want to know how to grow snow peas? From what I’ve seen and seen, Choose a location that is bright and sunny, has soil that drains well, and is preferably treated with compost in order to cultivate snow peas effectively.
Plant the seeds either straight into the ground or in seed trays, being sure to provide the vines with sufficient support in the form of a trellis or wire so that they may climb.
For best development, it is important to keep the soil wet but not soggy, particularly following the germination process, and to consider using liquid feeding.
When the pods are young, sensitive, and flat, which is normally between eight and ten weeks after the seeds have been planted, harvest them.
However, that is not all; as you continue reading, I will provide you with further information on the topic matter.
Now, let’s get started
How to grow & care for snow peas
Heavy croppers and snow peas are simple to raise in potted gardens or home vegetable beds.
Snow peas are a kid’s favorite because they are crunchy and sweet, and you can eat them raw or cooked. The flat pods are also edible.
Any season other than summer is ideal for growing snow peas since prolonged exposure to temperatures above 25°C would inhibit their ability to blossom and produce.
The big size of snow pea seeds makes them easy to handle and ideal for children to plant and grow in pots or in the yard.
Since snow peas may grow up to 1.5 to 2.0 meters tall, they are best cultivated on a trellis or other modest support.
The top five methods for cultivating snow peas:
Prior to planting, arrange the support or trellis structure and pick a spot that receives full sun. By doing this, you can prevent uprooting your snow peas later.
Before planting, till the top 20 to 30 cm of the soil with a fork, breaking up any lumps, and add compost or Scotts Osmocote Compost Premium Soil Improver.
Directly plant snow pea seeds in prepared, moist soil. Plant seeds at the base of your trellis or support, leaving 7 to 15 cm between each one.
Depending on your environment and the kind you select, snow pea seeds will sprout in 7–10 days and be suitable for harvesting 8–12 weeks after sowing.
Young snow pea seedlings are particularly vulnerable to slugs and snails. To protect your crops from predators, scatter Defender Slug & Snail pellets across the area.
What are the Snow Pea Plant Care
Light: Snow peas thrive in both partial shade and full sun, preferably six to eight hours of direct sunlight.
The delicate vines might be burned by too much direct sunshine.
Soil
Snow pea soil is best when it is well-drained, organically rich, and has a slightly acidic pH of 6.0 to 6.5.
Water: Peas require a lot of water—at least one inch each week—or else the pods may become tough and stringy rather than crispy and crisp.
Keep late crops well-watered when the weather warms. Root and seed rot can result from poor drainage.
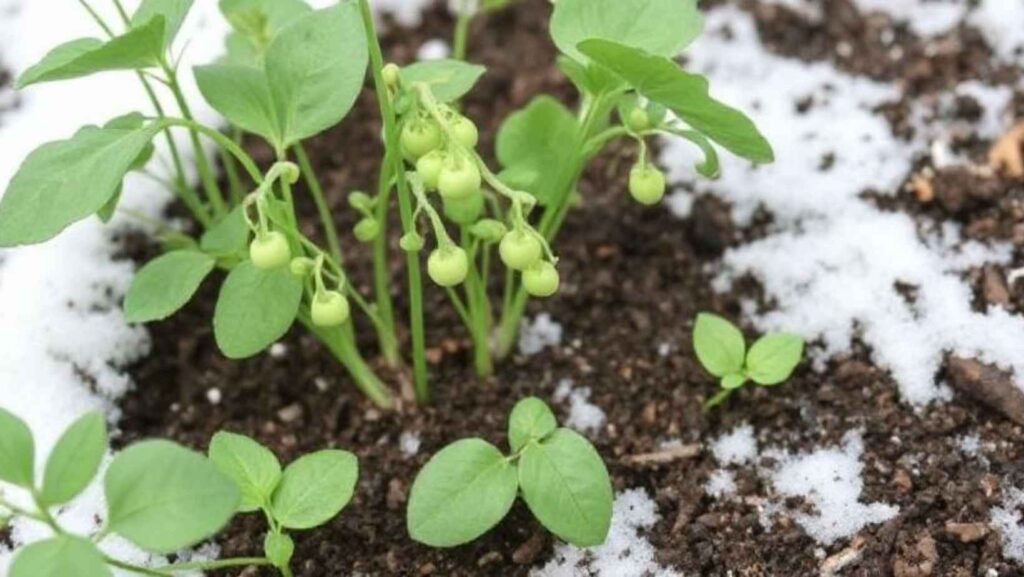
Temperature and Humidity: Snow peas can withstand the rare late snowflakes and thrive best in chilly conditions.
They are unaffected by light spring or autumn frost; however, germination takes longer if the soil temperature is about 40 degrees Fahrenheit.
They don’t do well in temperatures higher than 85 degrees Fahrenheit, just like any other pea.
As long as it stays cold, humid weather is not an issue.
Fertilizer: Snow pea fertilization is often not required if your garden’s soil is rich in organic matter and has been modified with compost.
Pollination: Snow peas, like other peas, are self-pollinating and don’t need wind or insects to do it
How to Harvest Peas
The pods of snap peas are picked before they have reached their full maturity. In order to be selected, pods should be full size, contain little seeds, and have flesh that is firm and crisp.
Approximately five to eight days after blossoming, snap peas are ready to be harvested. Pick the plant on a regular basis since it will flourish and develop the pods for three to four weeks.
Peas in the garden are ready to be harvested around 18-21 days after they have flowered. When the seeds are fully developed, pick the pods and shell them before using them.
You should use snap or garden peas as soon as possible for the optimum flavour and quality. If not used right away, store it in the refrigerator.
The harvesting of dry peas occurs after the pods have reached full maturity and are beginning to dry out further. The plants should be pulled up and laid out in a row in the garden for five to seven days.
When the plants have reached the point where they are dry, remove the pods, extract the seeds from their shells, and then wait for the seeds to dry even further.
Put the items in airtight containers and store them in a cool, dry location for long-term storage.
What type of soil is best for snow peas
In soil that is rich in organic matter, well-drained, and fertile, snow peas are able to flourish. If you want your plants to thrive, make sure the soil pH is between 6.0 and 7.5.
Before planting, it is possible to improve the soil’s fertility and structure by adding compost or manure that has been allowed to decompose.
Clay soils that are heavy and retain an excessive amount of moisture should be avoided since they might cause root rot.
Can snow peas be grown in containers
Yes, snow peas may be produced effectively in containers if cultivated properly.
It is recommended to choose a container with adequate drainage and a minimum depth and breadth of 30 cm.
A high-quality potting mix should be used, and the container should be exposed to direct sunlight.
Ensure that the soil is kept wet by watering it on a regular basis and providing the vines with a trellis or other support structure to climb.
What is the Best temperature for growing snow peas
It is excellent for snow peas to be grown in temperatures between 10 and 20 degrees Celsius.
Although they are able to withstand minor frosts, they suffer in hot weather, which can cause the plants to cease growing and lower the quantities they produce.
If you want to produce a crop in the autumn, planting them early in the spring or late in the summer helps to guarantee that they grow in the temperature range that they enjoy.
Can snow peas be grown indoors
It is possible to cultivate snow peas inside, provided that they are exposed to sufficient light, preferably from a window that faces south or underneath grow lights.
In addition to providing a trellis for the vines to climb, you should choose a container that is deep and has sufficient drainage.
To replicate the conditions under which they would develop in the wild, indoor plants require a steady amount of moisture and a colder climate.
How To prepare the soil for planting snow peas
Make sure that it has a good drainage system and a lot of organic stuffTo enhance the soil’s structure and fertility, compost or composted manure can be used.
Verify that the soil’s pH is between 6.0 and 7.5, and if it’s not, make the necessary modifications.
If you want to avoid root rot and poor drainage, you should avoid planting in soils that are heavy and clay-based.
What you need to know about snow peas
Categorized as Pisum sativum var. macrocarpon, snow pea, Chinese pea, and Chinese pea.
Height ranges from 1.8 to 2 meters, with dwarfs typically measuring approximately 0.6 meters.
Yearly plants are the kind.
A warm and chilly temperate climate, as well as a subtropical climate.
Full sun is the position.
There are white blooms, and then there are green pods that are flat and green in color.
Silky, waxy, and ovate (egg-shaped) in form, the foliage is characterized by prominent venations.
Attached to the vine in pairs along its length.
Feeding: organic debris that has decomposed completely prior to sowing.
Watering: watering the soil on a regular basis will keep it wet.
Final thought
Now that we have established how to grow snow peas, the cooler months are when snow peas thrive in most climes. In frigid climates, do not sow or plant until after the risk of frost has gone.
This is because frost can harm seedlings and affect growing pods. They are not heat tolerant and will cease to produce if grown during the warmer months.
Select a well-drained, sunny area in the garden and add compost for enrichment. Directly plant seeds, cover them with a thin layer of soil and give them plenty of water.
Seeds may rot if you water them again before they have germinated. To lessen transplant stress, water in seedlings with a diluted seaweed solution and avoid disturbing the root ball.